This project was a way to refamiliarize myself with Unity, an engine that felt like it was always changing in the realm of graphics. I had learned how to use Unity’s Universal Render Pipeline a couple of years ago and wanted to start learning the Scriptable Render Pipeline.
The Scriptable Render Pipeline (SRP) is an API layer used to schedule rendering commands from C#. With this, I could hijack unity’s built in post processing effects and run them through my own stylisation shaders.
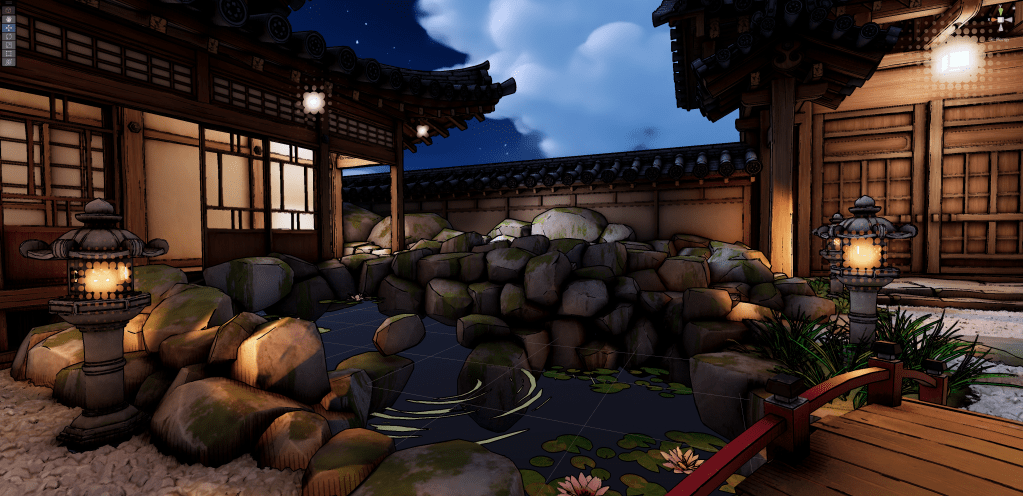
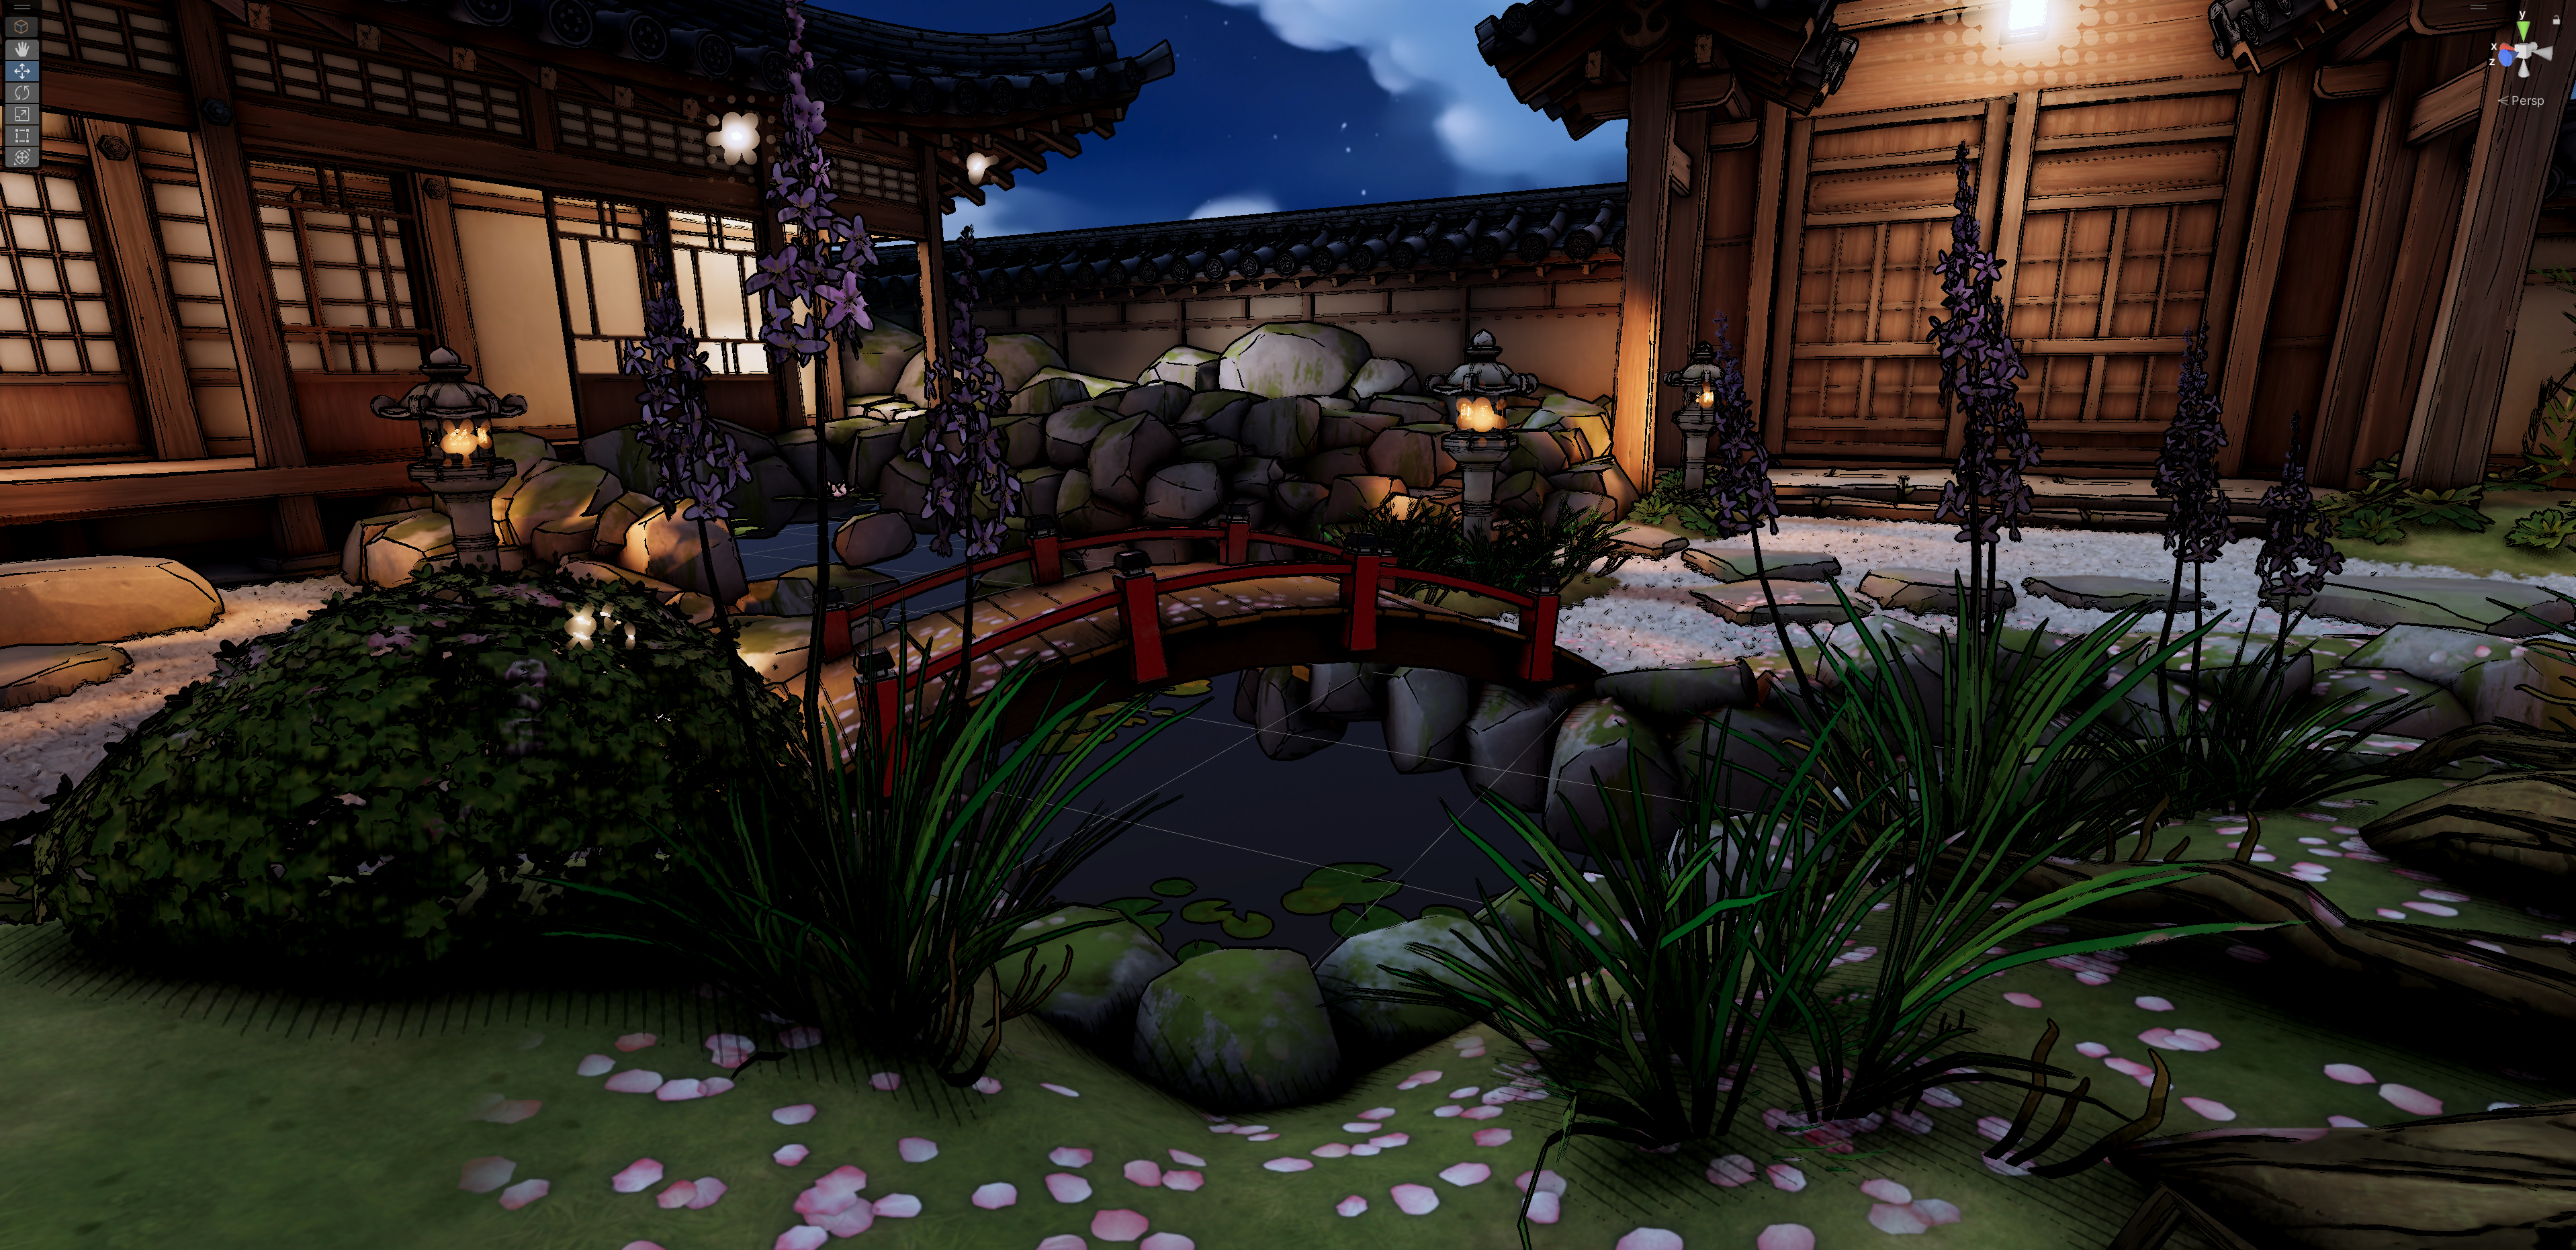
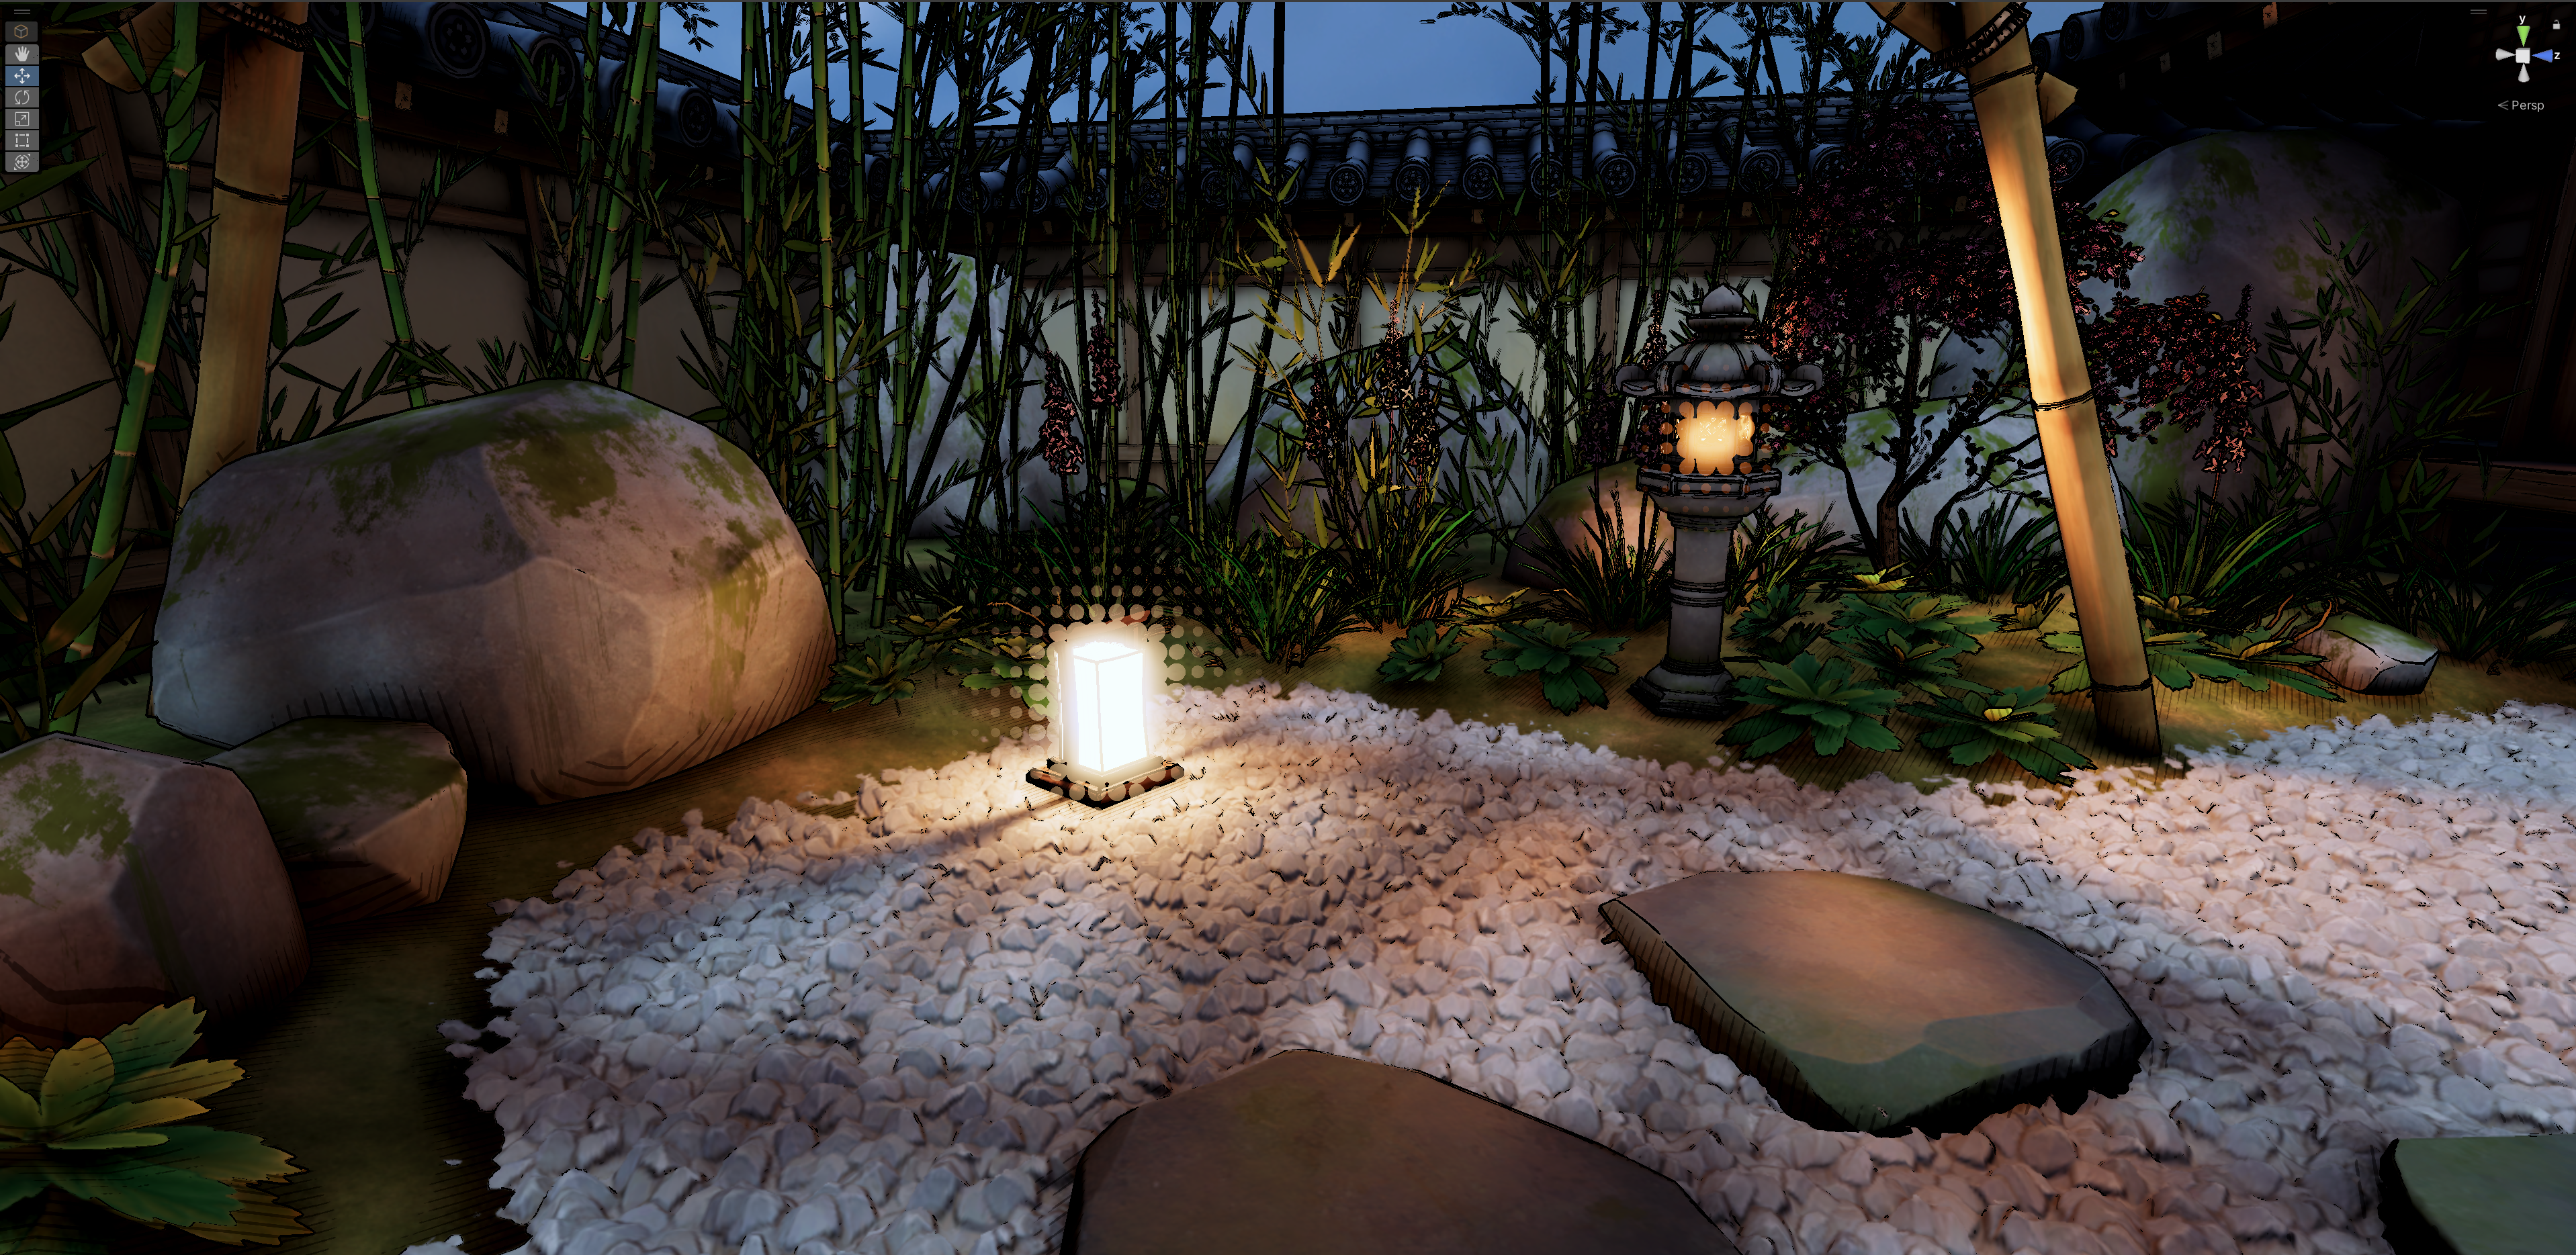
I added halftone dots to the bloom effect, hatching lines to the screen space ambient occlusion, and an inky edge detection outline.

Hatched Ambient Occlusion
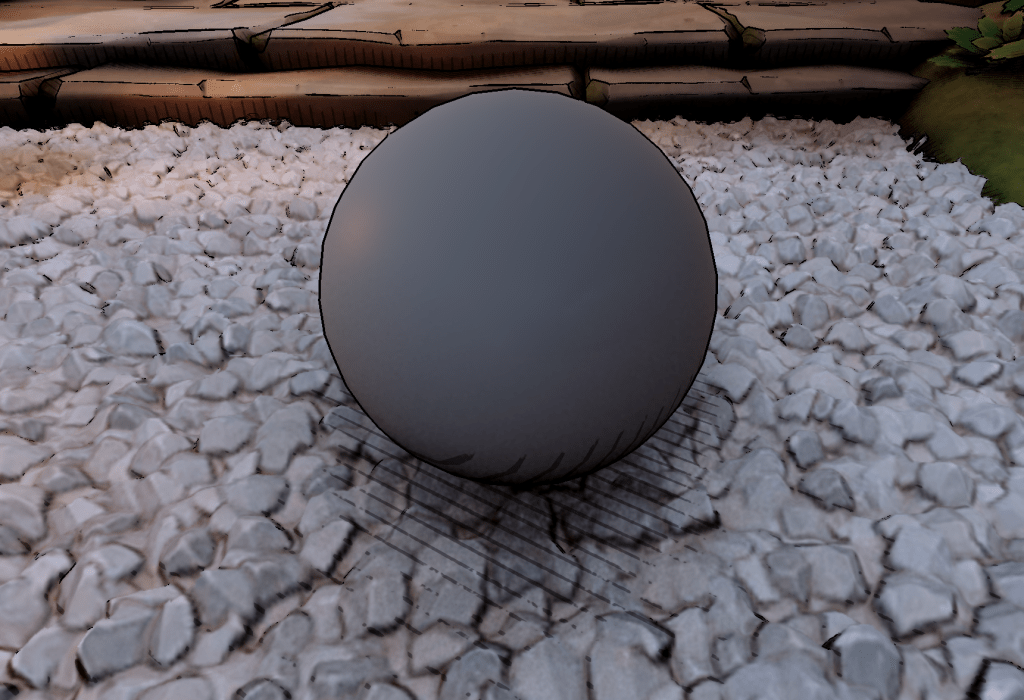
The shader uses world space coordinates in the X and Z axes through a sine function to create hatched lines. The sine wave result is run through a smooth step function with the screen space ambient occlusion to taper them off as the ambient occlusion gets less intense. The ambient occlusion scene texture comes from the render target that’s created in the render pipeline script.
Halftone Bloom

The bloom pass uses a similar process, stepping the bloom render target from the render pipeline with a bendet dot pattern. The dot pattern comes from the distance between tiled screen space UVs and the center of each tile – (0.5, 0.5). This creates a radial gradient pattern tiled across the whole screen. I took a bit of a shortcut in the shadergraph by using a voronoi node to achieve the same thing. In retrospect, this may be more expensive on the GPU as a voronoi function randomly offsets the center of each tile (the intensity of these offsets is 0 here but they’re still probably being calculated). In this context the performance difference would be minimal. However, in a production context where performance is more important, I would go the manual route.
Inky Outline
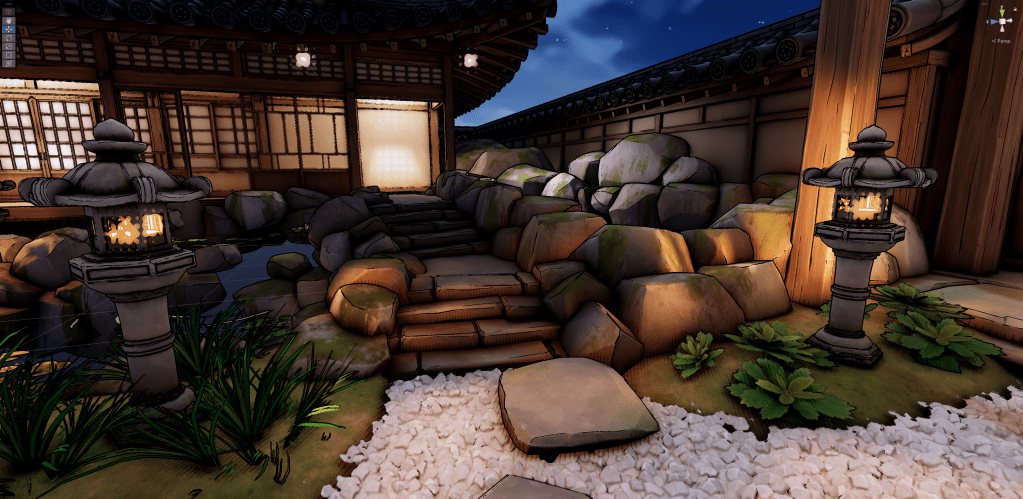
The edge detection outline is a 4 sample laplacian edge detection on the depth buffer. With an offset of 2 texels and thresholded at 0.7, the results are thick inky outlines. In other cases, I would use the normals as a scene texture in conjunction with the depth buffer, and potentially use an operator with more samples like an 8 sample sobel operator. However, I was pleasantly surprised with the results from this simpler process.
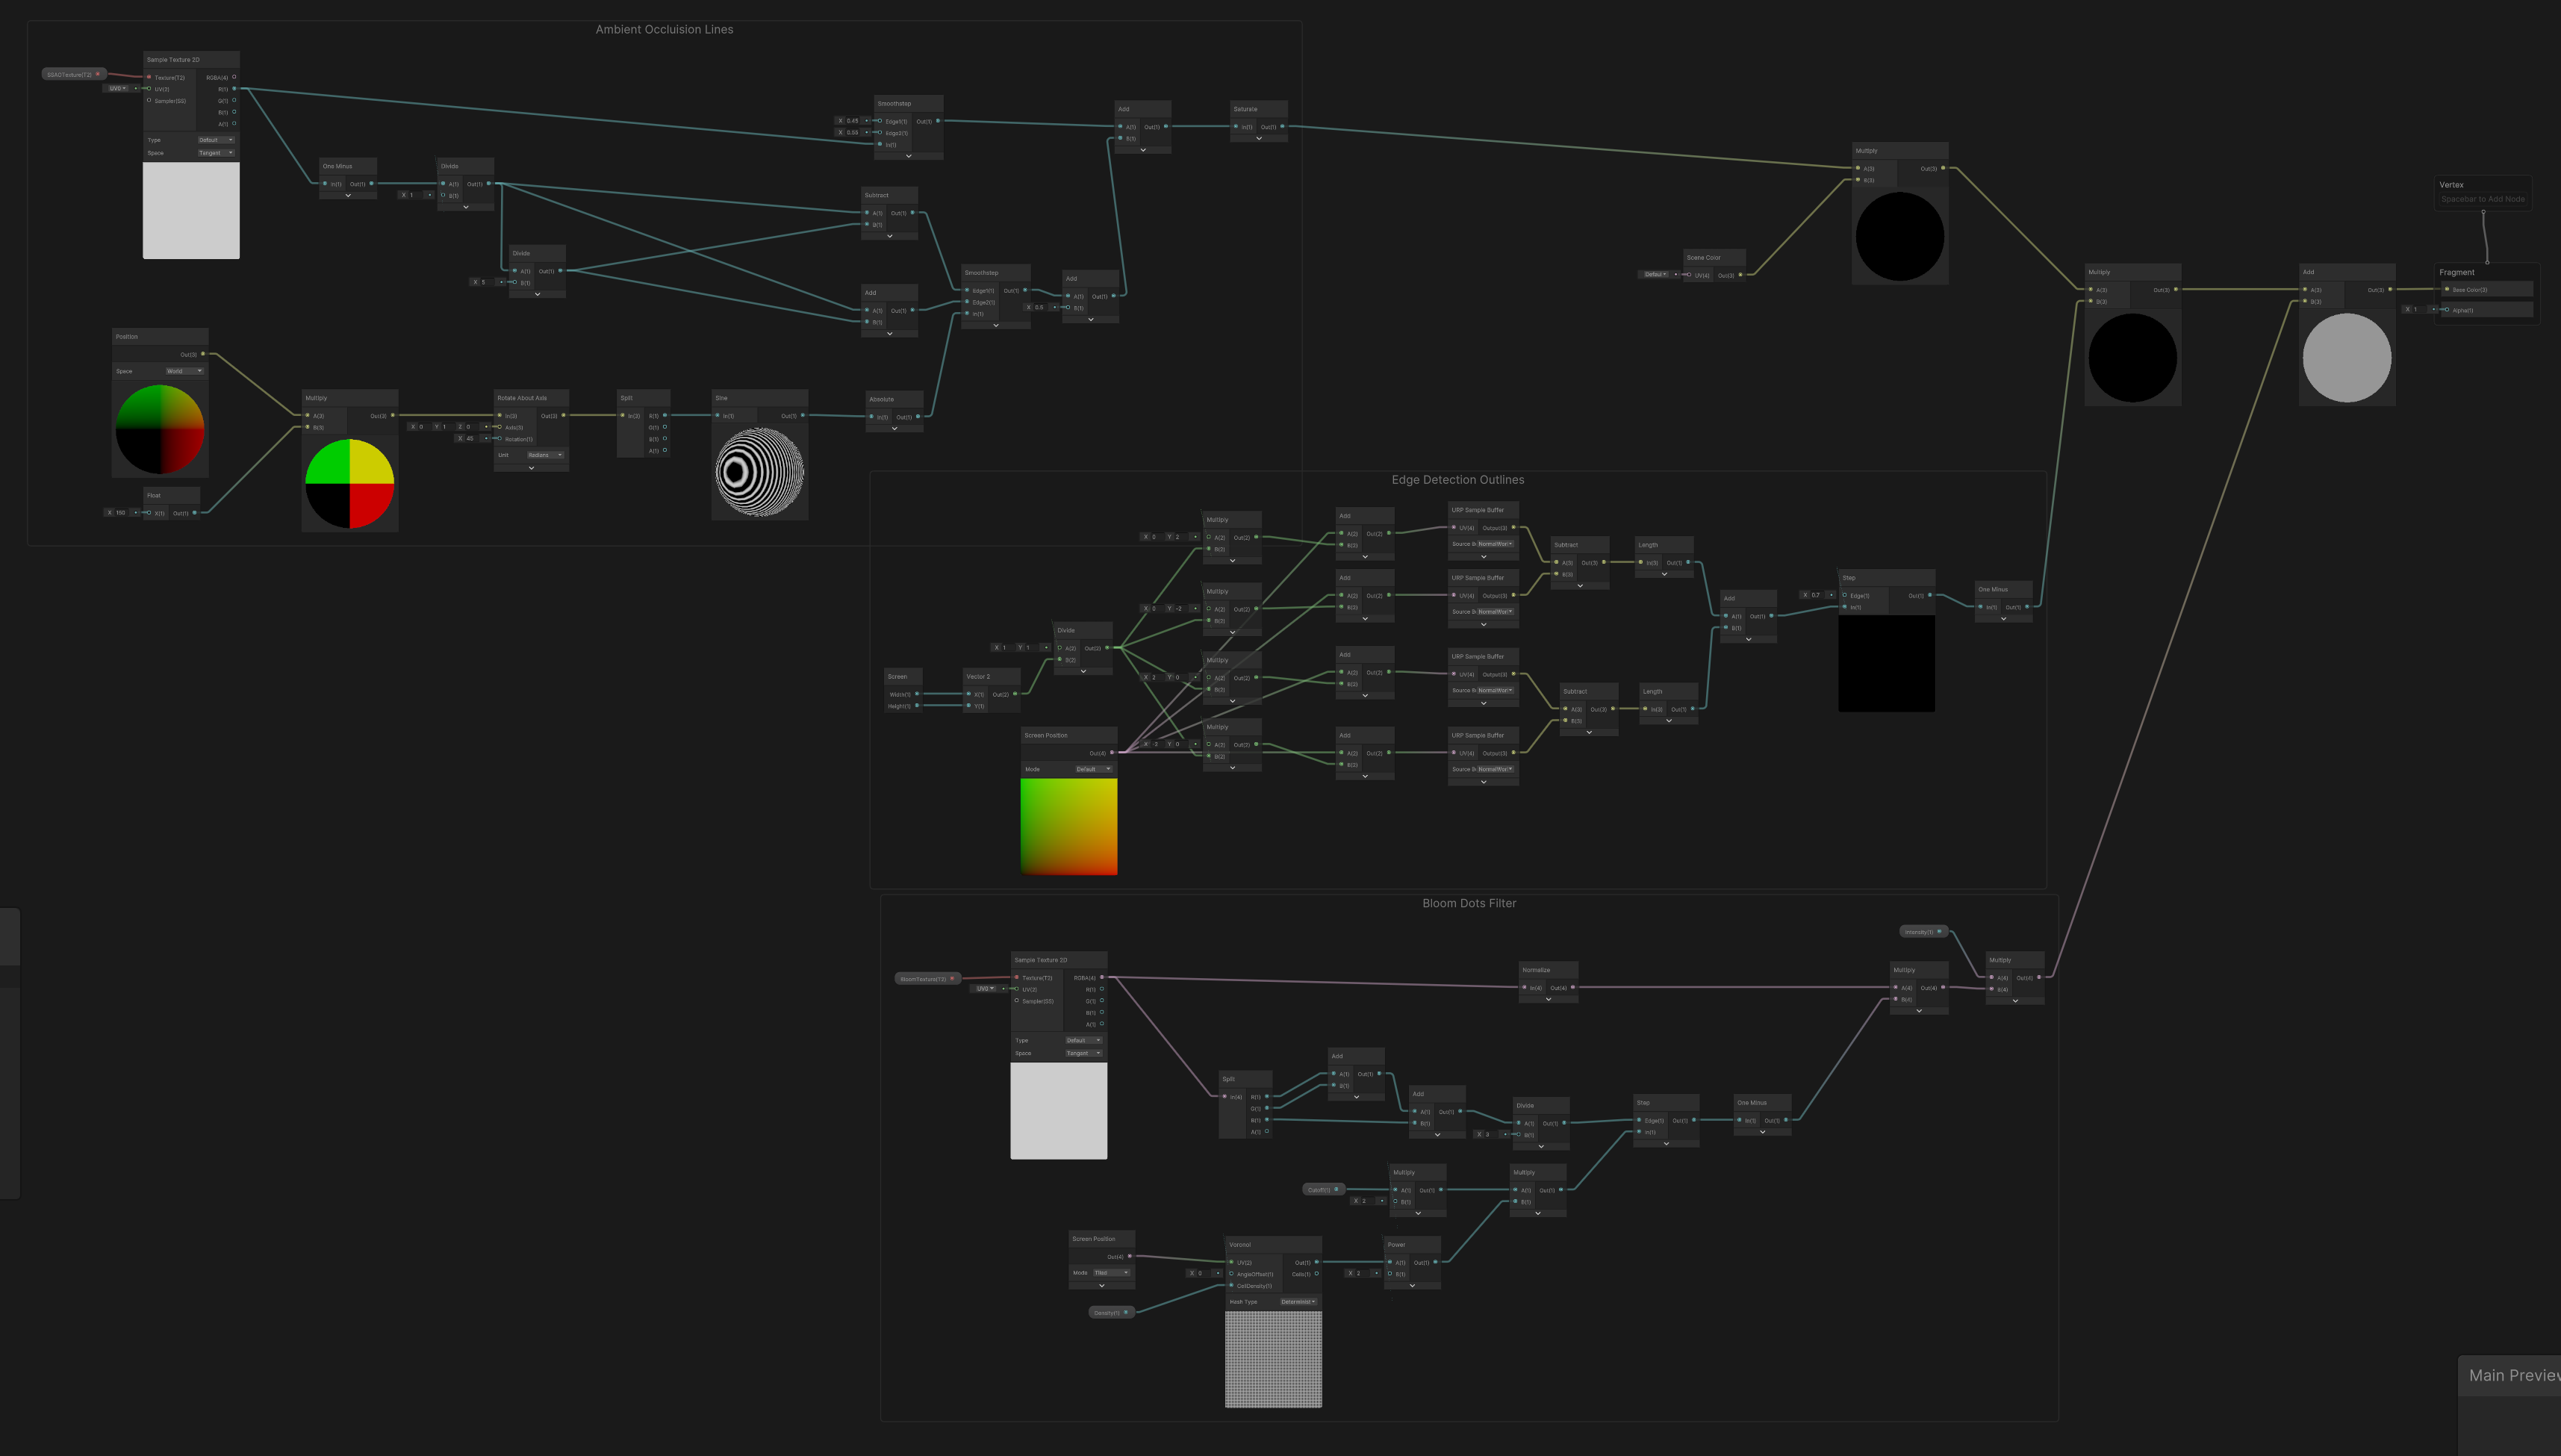
Shader and Code
The shader graph here contains the node paths for the bloom, ambient occlusion and edge detection outlines. It’s blitted all together with one material and the texture parameters are assigned separately in the render pipeline script. Blitting is writing one render texture to another, in this case its processed through a material using this shader. Another retrospective step I should’ve taken is putting each of these into their own subgraph so they can be edited separately.
Frame debugger showing the various bloom passes as created in the pipeline script:

My C# script that processes the render targets for the bloom and assigns the bloom and ambient occlusion scene textures:
The Execute method handles the processing of the stylised effects. It assigns the ambient occlusion scene texture and then calls the SetupBloom method. This thresholds the brightest pixels in the texture, downsamples the scene texture, blurs it, and then upsamples it as shown in the frame debugger screenshot above. It then assigns the bloom texture to the custom effects shader. The Execute method then goes on to blit the camera render target to itself using the custom effects shader. This outputs it to the screen with the ambient occlusion and bloom run through the custom effects. The outline is automatically handled in the shader.
// C# script for setting up bloom mip texturespublic override void OnCameraSetup(CommandBuffer cmd, ref RenderingData renderingData){ // sets up data from camera that renders scene, required setting initial render target from camera and descriptor ConfigureTarget(m_CameraColorTarget); m_Descriptor = renderingData.cameraData.cameraTargetDescriptor;}public void SetTarget(RTHandle cameraColorTargetHandle, RTHandle cameraDepthTargetHandle){ m_CameraColorTarget = cameraColorTargetHandle; m_CameraDepthTarget = cameraDepthTargetHandle;}public override void Execute(ScriptableRenderContext context, ref RenderingData renderingData){ VolumeStack stack = VolumeManager.instance.stack; m_bloomEffectComponent = stack.GetComponent<BendetBloomEffectComponent>(); CommandBuffer cmd = CommandBufferPool.Get(); // sets up profiling for visualising the pass in the frame debugger using (new ProfilingScope(cmd, new ProfilingSampler("Custom Post Process Effects"))) { // copies the SSAO texture to a new name Texture ssaoTex = Shader.GetGlobalTexture("_ScreenSpaceOcclusionTexture"); Shader.SetGlobalTexture("_SSAOTex", ssaoTex); // does bloom processing SetupBloom(cmd, m_CameraColorTarget); // setup values for compositing bloom shader m_compositeMaterial.SetFloat("_Cutoff", m_bloomEffectComponent.dotsCutoff.value); m_compositeMaterial.SetFloat("_Density", m_bloomEffectComponent.dotsDensity.value); m_compositeMaterial.SetVector("_Direction", m_bloomEffectComponent.scrollDirection.value); // blits composited bloom back into render pipeline Blitter.BlitCameraTexture( cmd, m_CameraColorTarget, m_CameraColorTarget, m_compositeMaterial, 0 ); } context.ExecuteCommandBuffer(cmd); cmd.Clear(); CommandBufferPool.Release(cmd);}private void SetupBloom(CommandBuffer cmd, RTHandle source){ // setups up bloom parameters, mostly copied from built in bloom pass script // start at half resolution int downres = 1; int tw = m_Descriptor.width >> downres; // bitshifts width resolution by downres factor int th = m_Descriptor.height >> downres; // bitshifts height resolution by downres factor // determine the iteration count int maxSize = Mathf.Max(tw, th); int iterations = Mathf.FloorToInt(Mathf.Log(maxSize, 2f) - 1); int mipCount = Mathf.Clamp(iterations, 1, m_bloomEffectComponent.maxIterations.value); // pre-filtering parameters float clamp = m_bloomEffectComponent.clamp.value; float threshold = Mathf.GammaToLinearSpace(m_bloomEffectComponent.threshold.value); float thresholdKnee = threshold * 0.5f; // hard coded soft knee // material setup float scatter = Mathf.Lerp(0.05f, 0.95f, m_bloomEffectComponent.scatter.value); var bloomMaterial = m_bloomMaterial; // set final parameter vector as values defined in the setup bloomMaterial.SetVector("_Params", new Vector4(scatter, clamp, threshold, thresholdKnee)); // prefilter var desc = GetCompatibleDescriptor(tw, th, hdrFormat); for (int i = 0; i < mipCount; i++) { RenderingUtils.ReAllocateIfNeeded( ref m_BloomMipUp[i], desc, FilterMode.Bilinear, TextureWrapMode.Clamp, name: m_BloomMipUp[i].name ); RenderingUtils.ReAllocateIfNeeded( ref m_BloomMipDown[i], desc, FilterMode.Bilinear, TextureWrapMode.Clamp, name: m_BloomMipDown[i].name ); desc.width = Mathf.Max(1, desc.width >> 1); desc.height = Mathf.Max(1, desc.height >> 1); } Blitter.BlitCameraTexture( cmd, source, m_BloomMipDown[0], RenderBufferLoadAction.DontCare, RenderBufferStoreAction.Store, bloomMaterial, 0 ); // first pass in bloom shader - downsample with gaussian pyramid var lastDown = m_BloomMipDown[0]; for (int i = 1; i < mipCount; i++) { // second and third passes are two pass gaussian blur, // one pass with 2x downsampling and a 9 tap gaussian, // second with a 9 tap gaussian but using a 5 tap filter with bilinear filtering Blitter.BlitCameraTexture( cmd, lastDown, m_BloomMipUp[i], RenderBufferLoadAction.DontCare, RenderBufferStoreAction.Store, bloomMaterial, 1 ); // blits first pass Blitter.BlitCameraTexture( cmd, m_BloomMipUp[i], m_BloomMipDown[i], RenderBufferLoadAction.DontCare, RenderBufferStoreAction.Store, bloomMaterial, 2 ); lastDown = m_BloomMipDown[i]; // sets last down to be used for the next iteration, defined by mipcount // passes render textures from last down to m_BloomMipUp to m_BloomMipDown, // then sets lastDown to m_bloomMipDown to start over again in the next iteration in the for loop } // fourth pass, upsampling (bilinear by default, bicubic with HQ) for (int i = mipCount - 2; i >= 0; i--) { var lowMip = (i == mipCount - 2) ? m_BloomMipDown[i + 1] : m_BloomMipUp[i + 1]; var highMip = m_BloomMipDown[i]; var dst = m_BloomMipUp[i]; cmd.SetGlobalTexture("_SourceTexLowMip", lowMip); Blitter.BlitCameraTexture( cmd, highMip, dst, RenderBufferLoadAction.DontCare, RenderBufferStoreAction.Store, bloomMaterial, 3 ); } // sets bloom texture to be used by the shader to filter and composite the bloom cmd.SetGlobalTexture("_Bloom_Texture", m_BloomMipUp[0]); cmd.SetGlobalFloat("_BloomIntensity", m_bloomEffectComponent.intensity.value);}This small project was a good step into Unity’s Scriptable Render Pipeline but there is still much to learn, especially on the C# side. There are lots of methods to become familiar with but the overall process is quite simple.
Resources and Further Reading
Unity Render Pass Example – Github
Writing Render Passes Using The Scriptable Render Pipeline In Unity – YouTube
Unlocking The Power Of Unity’s Scriptable Render Pipeline – YouTube
Scriptable Renderer Feature – Sam Driver
